Tuesday, December 8, 2009

Public Hearing on Fertilizer Ordinance

Speak now or forever hold your peace.

This is your opportunity to voice your thoughts on the proposed landscape and fertilizer ordinance. The Pinellas County Board of County Commissioners approved a proposed Fertilizer and Landscape Maintenance Ordinance for advertisement for public hearing. The public hearing will be held @ 6:30 p.m., January 19th, 2010 in the Board Assembly Room on the 5th Floor of the Courthouse, 315 Court Street, Clearwater, FL..

Here is a link to the draft of the ordinance considered at the Dec. 1 meeting: http://pinellas.ifas.ufl.edu/blog_commercial_connection/pinellasCounty_draft_fertOrdinance_20091207.pdf. With the exception of the deletion of Section 10 (b) and minor editing, this ordinance will be considered for adoption at the Jan. 19th meeting. The final version of the recommended ordinance will be posted on the County’s website at http://www.pinellascounty.org/BCC_agenda.htm no later than Jan. 14th, 2010.

Monday, November 30, 2009

Plaster Bagworm

This is a microscopic view of a plaster bagworm. The bag in which it lives is made from silken fiber, sand, lint, paint fragments and other debris.
They mainly feed on spider webs, but can also eat fabrics made from natural fibers.
Bagworms outdoors are harmless and can be left alone. For indoor control of bagworms it is important to remove spider webs and vacuum up any of the bagworms you find.
For more information see this UF/IFAS publication: http://edis.ifas.ufl.edu/ig090


Mango with Anthracnose

Anthracnose is a fungus that is promoted and spread by heavy rainfall (or irrigation) and dew.

Control is achieved by regular spraying of fungicides at the spray intervals recommended on the label. Spraying starts during flower panicle development and continues until the preharvest waiting period is reached.

To cut down on spraying consider planting Indo-Chinese/Philippine-type mangoes. Many of the mangoes in this group are relatively resistant to anthracnose and will significantly reduce dependence on regular spraying for disease control. The fruit have good flavor and low-fiber flesh (which is a good thing).

For more information about this disease see this UF/IFAS publication: http://edis.ifas.ufl.edu/vh048 To learn more about growing mango see this publication: http://edis.ifas.ufl.edu/mg216

Thursday, November 19, 2009

Do you see these symptoms on your citrus tree?

Water is the single most important factor affecting the severity of this disease.

This disease should be controlled mainly on fruit intended for the fresh market. It is only a serious disease on certain varities of citrus. It mainly affects lemon, Murcotts, Minneola and Temple varities and is often a problem on grapefruit.

For more information about this disease, its causes and control see this link: http://edis.ifas.ufl.edu/CH014


Wednesday, November 18, 2009

Can you tell the difference?

Which one of these is the invasive Brazilian pepper tree and which one is the native holly tree? Can you tell the difference?

Brazilian pepper (Schinus terebinthifolius) is a very invasive, non-native tree. Unfortunately, with its bright red berries that become quite obvious this time of year, it sometimes gets used as a holiday decoration. Worse yet, it has been misnamed Florida holly. Make no mistake - this is NOT Florida holly!

Brazilian pepper is one of the most aggressive, non-native invasive species. Once ecologically productive mangrove communities are now pure stands of Brazilian pepper trees. Scrub and pine flatwood communities have also been destroyed by this invasive tree. It can be easily identified by its compound leaf (odd-pinnately compound) with 3 to 13 oblong or elliptic, finely toothed leaflets. The leaves smell like turpentine when crushed. Berries are in clusters. They start off green and turn a bright red when ripe.

For more information about Brazilian pepper and how to control it see this link: http://edis.ifas.ufl.edu/AA219

A very nice native holly, dahoon holly, can be mistaken for Brazilian pepper and vice versa. The native holly tree has a simple leaf which is the most easily identifiable difference.
For more information about hollies, see this link: http://edis.ifas.ufl.edu/topic_holly

Monday, November 16, 2009

Fun Festivities at First Annual Farm-City Week

Come enjoy the festivities and see the past, present and future of Pinellas County Agriculture at the Farm-City Week celebration. It will be held at Heritage Village, Saturday, November 21. It starts at 9 AM and goes until 4 PM.

Pick up your fresh veggies and more for Thanksgiving dinner at the Market in the Park. Sample grove and dairy treats, play old time games, learn about Ag-oil and more. There is fun for the whole family.

Friday, November 6, 2009

Citrus Leafminer - A Curiosity

We have had several samples of contorted leaves with serpentine squiggly lines brought to our help desk by concerned citrus owners.

Folks want to know what is happening with their citrus leaves and if it will kill their tree.

This damage is caused by the citrus leafminer (the larval stage of a small moth) and it is mostly cosmetic damage. Mature trees can easily tolerate this damage. Young trees may need to have some horticulture oil sprayed on the new growth to keep this damage to a minimum.

For more information see this publication: http://trec.ifas.ufl.edu/mannion/pdfs/CitrusLeafminer.pdf

Thursday, November 5, 2009

Cypress Twig Gall Midge

These pretty berry looking appendages on the ends of the twigs are a gall caused by a midge. No cause for alarm -- just think of them as an extra oddity to the plant.

For more information see this publication: http://edis.ifas.ufl.edu/pdffiles/IN/IN80600.pdf

Giant Caterpiller Eats Plumeria

Take a look at your Plumeria to see if this colorful caterpillar is munching away at the leaves. This is the georgeous larva of the plain looking tetrio sphinx moth. One of its favorite host plants is Plumeria. Please consider sparing this caterpillar. Your Plumeria leaves will soon be falling off anyway.

For more information see this publication: http://edis.ifas.ufl.edu/in621


Monday, November 2, 2009

The Case of the Brown-tipped Oak

By Andy Wilson
Extension Specialist

The client was concerned about her oak tree. She had noticed that the last several inches of some of branches were dead, with brown, lifeless leaves. She brought some branch samples to our Lawn and Garden Help Desk, fearing the worst. Was this something that would spread? Would it kill the tree?

Looking at the damage, my first suspicion was twig borers, tiny beetles that bore into branches. These borers introduce a fungus that kills the branch from the point where the beetle has entered the branch to the branch tip. Often this is the last one to 2 feet of the branch. The fungus serves as the food source for the immatures (young). The entrance holes are tiny and my middle-aged eyes, even with the help of reading glasses could not locate a hole. However, a quick look under the microscope revealed the tiny, round hole, almost machine drilled in its appearance.

Twig borers are common on many kinds of trees in our area, including red maple, oaks and some other trees. The damage is usually more cosmetic than threatening to the tree. Eventually the dead branch tips drop to the ground. Insecticidal treatment is usually not necessary.

More information about twig borers can be found here: http://www.entnemdept.ufl.edu/creatures/trees/black_twig_borer.htm

Friday, October 30, 2009

Powdery Mildew of Cucumber

By Andy Wilson
Extension Specialist

Fall is a good time for vegetable gardening in Pinellas County and cucumbers are one of the many vegetables that can be grown now. Cucumbers are not difficult to grow but, as with other vegetable crops, some problems can occur. One of the most common disease problems of cucumbers is powdery mildew. We usually receive many samples of this disease during the fall through spring vegetable gardening seasons at our Lawn and Garden Help Desk.

Powdery mildew is one of the easier to diagnose diseases due to the distinctive white fungal growth it produces. This growth resembles a fine dusting of talcum powder over the leaves. Heavily infected leaves turn brown, shrivel and die.

Where possible, select cucumber varieties that are known to be resistant to powdery mildew. Also, keep the plants adequately fertilized. Cucumber plants that are suffering from nutrient deficiencies tend to be more vulnerable to attack by powdery mildew than healthy plants.

Among the fungicides that can be applied to cucumbers in the home garden to control powdery mildew are copper fungicides and neem oil. Neem oil may harm bees and other beneficial insects. Be sure to read and follow all label directions. For more information on disease control on cucumber see this fact sheet: http://edis.ifas.ufl.edu/PG046

Monday, October 12, 2009

Take-all Root Rot of St. Augustine lawn

In August and September we saw many Take-all Root Rot samples brought in to our Diagnostic Desk by frustrated homeowners. Periods of heavy rainfall and a stressed lawn trigger this disease which appears in summer and early fall.

Yellow and light green patches of St. Augustine lawn that eventually thin and die are the symptoms our walk-in customers described. Roots show the symptoms before the leaves do. By the time the leaves turn yellow, the disease has been destroying the roots for weeks or even months.

This disease is more easily prevented than controlled. Reducing stress on the lawn in the areas of mowing, fertilizing and herbicide applications is important. Proper watering, with a Rain Sensor Shutoff for sprinkler systems, helps in prevention.

There is no chemical control for Take-all Root Rot unless you are treating preventatively.
For more information, please see this University of Florida link: http://edis.ifas.ufl.edu/pdffiles/LH/LH07900.pdf

Thursday, October 8, 2009

Hickory Horned Devil

This imposing larva (caterpillar), known as the hickory horned devil, is most often observed when it is full grown and comes down from the trees to wander in search of a site for pupation. It can beome as large as a hot dog.

This large caterpillar will eventually become the regal or royal walnut moth, one of our largest and most spectacular moths. Like most other moths, it is nocturnal but is sometimes observed around lights at night.
The regal moth typically has only a single generation per year. In Florida adults have been collected in May, but are more common during the summer.

The larvae live about 35 days and have been reported from a variety of host tree species. They are commonly found on species of the family (Juglandaceae) including walnut (Juglans nigra), butternut or white walnut (Juglans cinerea), and a variety of hickories (Carya spp.) including pecan. In Florida, larvae are frequently found on sweetgum (Liquidambar styraciflua). Other hosts commonly listed are persimmon (Diospyros virginiana) and sumacs (Rhus spp.).

In central Florida, larvae are usually found from late July to mid-August while they are wandering on the ground searching for a suitable location to burrow into the soil for pupation. The pupa is the overwintering stage.

The regal moth is a beautiful and fascinating member of our native fauna, and its larvae should NOT be killed. If a larva is found crawling on pavement or in an area of thick turf grass where it would have difficulty burrowing, it should be moved to an area of soft soil or a mulched area where it can burrow for pupation.

For more information see this website: http://entomology.ifas.ufl.edu/creatures/bfly/regal_moth.htm

Wednesday, October 7, 2009

Cicada Killer

This giant ground wasp, the Cicada Killer, hunts cicadas as a food source for their young. This giant wasp can dig a 4-foot burrow in the ground with several branches and cells. One to four cicadas are placed in each cell for the larvae to eat.

The female paralyzes the host (cicada) by stinging it, then carries the cicada by dragging or flying to the nest. One egg is placed on the last cicada in each nest.

Cicada killers are usually considered beneficial insects since they destroy plant feeding cicadas. Also, they rarely sting except when the females are handled. However, under certain circumstances such as when elderly persons or young children are present in the breeding areas one may want to discourage their presence. This can be done by eliminating or reducing the breeding area which usually consists of exposed, sandy soil. This area can be mulched or covered with grass. Labeled insecticides can be applied to the nesting sites to kill the wasps.

For more information see this site: http://www.entnemdept.ufl.edu/creatures/beneficial/cicada_killers.htm

Monday, October 5, 2009

New Weevil In Town

A new exotic insect has recently been seen in the landscape and brought into our Horticulture Help Desk for identification. This is a new exotic invasive weevil called the Sri Lanka weevil. It does leaf and root damage to several fruit trees, palms, ornamental plants and citrus.

There are no pesticides registered for homeowners to use on fruit trees. For landscape trees, severe infestations can be controlled using insecticides which include carbaryl (Sevin), acephate (Orthene) or a pyrethroid labeled for leaf-feeding insects.

They can be removed from ornamental or fruit trees by holding an open, inverted umbrella under a branch and shaking it vigorously to knock the weevils into the umbrella. The weevils can then be dumped into a bucket of soapy water and they will drown.

For more information see this University of Florida publication: http://trec.ifas.ufl.edu/mannion/pdfs/SriLankaWeevil.pdf or google: Sri Lanka Weevil IFAS.

This notching of the leaf edge is typical damage caused by this pest. Be aware that other types of insect pests can cause similar damage. Many times this damage is cosmetic and the plant recovers. Small plants and young trees may need protection.

Thursday, July 30, 2009

YardWork (7/30/09) - Summer Lawn Care ~ Fertilizer and Weeds

Figuring Out Fertilizer for the Home Lawn
http://edis.ifas.ufl.edu/ep221
Best Management Practices for the Home Lawn
http://edis.ifas.ufl.edu/EP236
Weed Management in Home Lawns
http://edis.ifas.ufl.edu/EP141
How to Calibrate Your Fertilizer Spreader
http://yourfloridalawn.ifas.ufl.edu/fertspreader.htm

Thursday, July 23, 2009

Thursday, July 16, 2009

YardWork (7/16/09) - Ground Covers as Alternatives to Grass

Ground Covers for Central Florida
http://edis.ifas.ufl.edu/EH138
Ground Covers for South Florida
http://edis.ifas.ufl.edu/EH139
Native Ground Covers for South Florida
http://edis.ifas.ufl.edu/EH402
Ground Covers for Florida Homes
http://edis.ifas.ufl.edu/EP016

Thursday, July 9, 2009

YardWork (7/9/09) - Critters that Invade After Heavy Rains

Centipedes, Millipedes, and Earwigs
http://edis.ifas.ufl.edu/IG093
Least Toxic Methods of Cockroach Control
http://edis.ifas.ufl.edu/IG105
Mosquito Control
http://edis.ifas.ufl.edu/TOPIC_Mosquito_Control

Sunday, July 5, 2009

Summer Lawn Care

By Pam Brown, UF/IFAS Emeritus Extension Agent

The summer months in Florida can be some of the most challenging for keeping our lawns looking good. We normally have heavy thunderstorms that produce short bursts of heavy rain that can wash nutrients from the soil. For this same reason, you should be very careful with fertilizers and pesticides that can wash out of our lawns and into storm drains. Many people believe that you should put out fertilizer or pesticides when rain is predicted so that it is watered in, when in reality our heavy rains will wash these away. The best management practice is to put down fertilizer and any granular pesticides before your scheduled irrigation day. This way the gentile sprinkling will dissolve the chemicals directly into the soil. Research shows that too much fertilizer during summer months actually can increase chinch bug infestation on St. Augustine grass. Try spraying Iron sulphate instead to green up the lawn but not create lush growth that is tasty to pests.

Areas of the lawn that are turning straw colored and dying can indicate an insect infestation. Chinch bugs infest primarily St. Augustine grass. Grubs eat the roots of several of our grass
varieties, as do the caterpillars of the sod web worm moth. For more complete information on lawn pests see the University of Florida/IFAS publications at http://edis.ifas.ufl.edu/topic_turf_pest_insects

Weeds can also seem rampant during the heat of summer. Be cautious with herbicides during this time. When the temperatures are 85 degrees or higher, weed control chemicals can damage the grass along with the weeds. This goes for weed and feed fertilizers also. Keeping your grass healthy will help crowd out weeds. Mowing the grass at the proper height can also help deprive weed seeds the light they need to germinate and grow. St. Augustine and Bahia grass should be mowed at 3 1/2 to 4 inches. Dwarf St. Augustine and Bermuda can be mowed much shorter at 1 to 2 inches. Remember, also keep your mower blade sharp so that the blades are cut cleanly and not chewed off.

You can find additional information about lawn care from University of Florida/IFAS researchers at http://edis.ifas.ufl.edu/topic_lawn_care

Monday, June 22, 2009

It's Hurricane Season

By Pam Brown, Emeritus Extension Agent

Hurricane season is upon us. Now is a good time to be sure that your landscape is prepared before the weather starts heating up in the tropics.

Trees are the largest plants in our landscapes and the most vulnerable to high wind. But you must also consider everything in your landscape. Create a plan for securing or storing anything that can become a missile in high winds.

After hurricanes, we see pictures of uprooted and broken trees. Some trees are stronger than others in high winds. It is primarily the way branches are attached to the trunk that determines how well trees behave in high winds. The angle of attachment that branches have with the trunk can be a problem. The strongest attachments are those that have an angle greater than 45 - 50 degrees. Narrower attachments of less than 45 degrees can contain included bark which creates a very weak at the junction of the trunk and the limb that is more likely to break. Branches that are as large in diameter as the trunk are very heavy and can split away from the trunk Dead branches break easily in winds and can cause damage to structures.

Some trees are brittle and do not do well in high wind no matter what their structure. Cherry laurel and sand pines are a couple of the worst. Trees that have been planted for less than one year should be staked to stabilize the root system if this was not done at planting. Palms do not need “hurricane cuts”; this type of pruning actually makes palms more vulnerable to wind damage

If we have large trees with some of these problems - what should we do? Trees that have structural problems can be pruned to improve their wind resistance. It is best to contact a certified arborist to evaluate and prune large trees. Do not let someone talk you into topping your trees. This can create a hazard tree that is more likely to fail. There are a lot of tree surgeons out there that are not certified arborists. You can find a certified arborist in your area by going to: http://www.treesaregood.com/findtreeservices/FindTreeCareService.aspx. Be sure to ask anyone you call for references and proof of liability insurance.

There are other things to do to prepare your landscape for hurricane force winds. Healthy landscape plants survive hurricanes better on average, so, maintain your landscape appropriately. Review everything you have outside in your yard and prepare a plan for the items in your landscape that can be dangerous in high winds. Almost anything can become a missile if the wind is high enough, including rock mulch. If you have plants in pots, determine where they will be stored during the storm. If you do not have room to secure them inside, you could place them between a structure and a high dense hedge. Very large plants in containers could be secured with tie downs or turned over on the side up against a corner wall.

Patio furniture likewise is vulnerable and must be secured. Glass top and other heavy tables can be placed top down on old towels on a secure surface. Chairs should be secured inside or tied together and secured. Yard art can be easily overlooked and could become flying missiles during hurricanes, so be sure to secure these items inside. And, don’t forget to bring the garden hoses, tools, and toys inside.

Plan now for what you will do to prepare your landscape - write the plan down so you will not forget something when a hurricane is on the way. When creating your plan, remember to be realistic about how much time you will need to accomplish all of the tasks.

For more complete information about hurricanes and your landscape, please visit the University of Florida/IFAS Pinellas County Extension website at: http://pinellas.ifas.ufl.edu/hurricanes_landscape.shtml

Tuesday, May 26, 2009

Termites and Mulch


Mulch provides many benefite in the landscape.  It helps prevent the loss of water from soil by evaporation and can improve the absorption of water into the soil.  Mulch can supress weeds; moderate soil temperature; and reduce erosion.  The University of Florida recommends organic mulches since they add organic matter to our infertile soil as they decompose.  You do not need to remove old organic mulch when you apply new - the old will just decay and add organic matter back to the soil.

The question of termites in mulch comes up quite often.  A University of Florida/IFAS research study conducted using Cypress, Eucalyptus, Melaleuca, Pine bark, Pine straw and utility mulch showed that termites fed on all of the mulches.  However, Melaleuca mulch was the most resistant to termite feeding.

In Florida, termites are already in our soil.  Mulch increases the ability of termites to survive where they are already extablished by keeping the soil moist and temperatures moderate.  Mulch applied at greater than 4 to 6 inches thick up to the foundation can also provide a bridge over the treated perimeter of a house, allowing termites to walk over from landscape to house and avoid contact with soil treated with termiticides.  It is best to keep at least a 12 inch area adjacent to the foundation free of mulch or other ground covers.  Mulch is useful in keeping mud from splashing up against a house, so, it is recommended that no more than a thin layer (about one inch) of mulch be placed within 12 inches of the foundation to allow the soil beneath to naturally dry if you need it. Drying out is the termite's wost enemy.  You will also want to avoid watering next to foundation walls.

Termites are everywhere in the Florida soil environment, so the best defense is to keep termite protections up to date with soil treatments and/or bait systems.

You can access additional UF/IFAS Extension information about termites at: http://edis.ifas.ufl.edu/topic_termites

Thursday, April 23, 2009

Nun’s Orchids


By Pam Brown, Retired Extension Agent

Nun’s orchids (Phaius tankervillae) are terrestrial orchids, meaning they will grow directly in the ground or soil. The hooded flowers are held single file on three to four foot stems. The showy flowers can measure up to five inches across and many are fragrant. The thin pleated leaves can grow up to about three feet in height. The flowers develop during late winter and early spring and they open from the bottom of the stalk to the top over a period of about six weeks and then last about a month.

These orchids prefer a very organic soil with an acidic pH and partial shade. By working peat, compost and partially decomposed pine bark in a concentration of about 60 – 70 percent into the soil, you can improve the pH. You may also need to add sand or perlite to the planting area to improve drainage. They like an even level of moisture during the time of new growth and blooming. After the new foliage matures you can begin to let the top two inches of soil dry out between watering. I find it easier to grow mine in container where I can control the soil mixture better. And, for areas that routinely get temperatures below 35 – 40 degrees F, a container that you can move inside or to a very protected is needed. They are severely damaged at temperatures below 32 degrees F.

It is easy to propagate Nun’s orchids. You can simply divide the pseudobulbs by removing the plant and cutting the pseudobulbs apart with a knife keeping roots with each section. Or you can root the expended flower stalk. Carefully cut the flower stalk from the plant. Prepare a long tray with damp sand, and then lay the flower stalk in the tray. Keep the sand and the environment moist with low light, and in two to three months you may see new shoots growing from the nodes on the flower stalk. Alternately, cut the stalk into sections just below a node where a flower was attached. Dust the cut end with rooting hormone and plant in damp sand. Again, it will take two to three months to see new sprouts.
For more information on Nun's orchids, visit the University of Florida/IFAS Extension Solutions for Your Life web site at: http://solutionsforyourlife.ufl.edu/hot_topics/lawn_and_garden/nuns_orchid.html

Wednesday, March 11, 2009

Butterfly Gardening with Kids


By Pam Brown, Urban Horticulture Extension Agent

Gardening with children can be a fun and educational activity. A butterfly garden is easy to do and will provide eggs to look for, along with caterpillars and butterflies to watch. It is a great way to spend quality time with your kids.

Now is a good time to plant a butterfly garden. You need to have location with lots of sun, a site that is not soggy, and that you can get water to for irrigation. The size is up to you - but involve children in the planning and selection of the location. You can talk about the needs for sun of both the plants and butterflies. If you have more than one child that will be gardening, you might want to assign them to areas of the garden.

If the children are small, they need tools that fit their size. You can find some really cute tools by shopping around. Take the children with you so that you can judge if the tools are appropriate. They will need gardening gloves to protect their hands. Some adult tools are for small areas and will be appropriate for older children.

One of the most important tasks for planting a garden of any kind is preparing the soil. If the area has not been a garden, you will want to clear it of all grass or plants and then add compost or other organic matter along with a good balanced slow release fertilizer to the area and spade it in. This is a good job for the kids - they like to dig in the soil. Teach them that growing a healthy garden starts with good soil and that plants, just like people, need water to drink and nutrients to grow. Once the material has been incorporated - rake the area smooth.

When choosing plants for your garden, you may want to consult the University of Florida/IFAS Extension publication Butterfly Gardening in Florida. Plants with flowers that are nectar or food plants will attract many kinds of butterflies. However, each species of butterfly has specific plants that they lay the eggs on so that the caterpillars have the proper food once they hatch. You will want to plant some of both in your garden. Select plants for instant effect and also purchase some seeds for the children to sow. Watching seeds sprout from the ground is a fun thing for kids. The publication listed above has lists of specific larval plants for each type of butterfly. Milkweed is both a larval plant for the Monarch and nectar source for many butterflies. Parsley, dill, fennel and carrots are larval plants for American Swallowtails. Many of our native plants are both larval and nectar sources for many butterflies. Bidens is a native that grows in many open areas and the medians of the roads that serves as a wonderful nectar source. You will want to talk with your children about the fact that the eggs that the butterfly lays will hatch into caterpillars that will eat the leaves of the plants. Some children get upset that the plants are disappearing. The caterpillar will then form a chrysalis (cocoon) that the butterfly will emerge from. Getting to observe this process is truly magical for children and adults.

Butterfly caterpillars are blind. They do not build their chrysalis on the plant they feed on - they climb down and crawl along the ground until they bump into something. They will then climb up to form the chrysalis. Planting a barrier around the edge of the garden will help keep them in the garden and give them a place to go. Liriope, daylilies or other bushy low growing plants will do. You could also put a few rough wooden planks in the garden or a bench. This will also provide some place to build a chrysalis.

Once you have your garden planted, the plants will need to be watered daily for the first few days then every few days for several weeks. Where seeds are planted the soil should be kept moist until the seedlings have two sets of leaves, then taper off. This is a good job for children. A watering can will keep the seeds from being washed out of the ground or use a hose end sprayer set on a gentle setting. You will need to add some additional fertilizer every two or three months, depending on the type you use. Follow the information on the label.

You should see butterflies visiting in a few days, and then plan to visit the garden every few days to watch for caterpillars, chrysalis and butterflies emerging.

Please watch our short video below for butterfly gardening information.
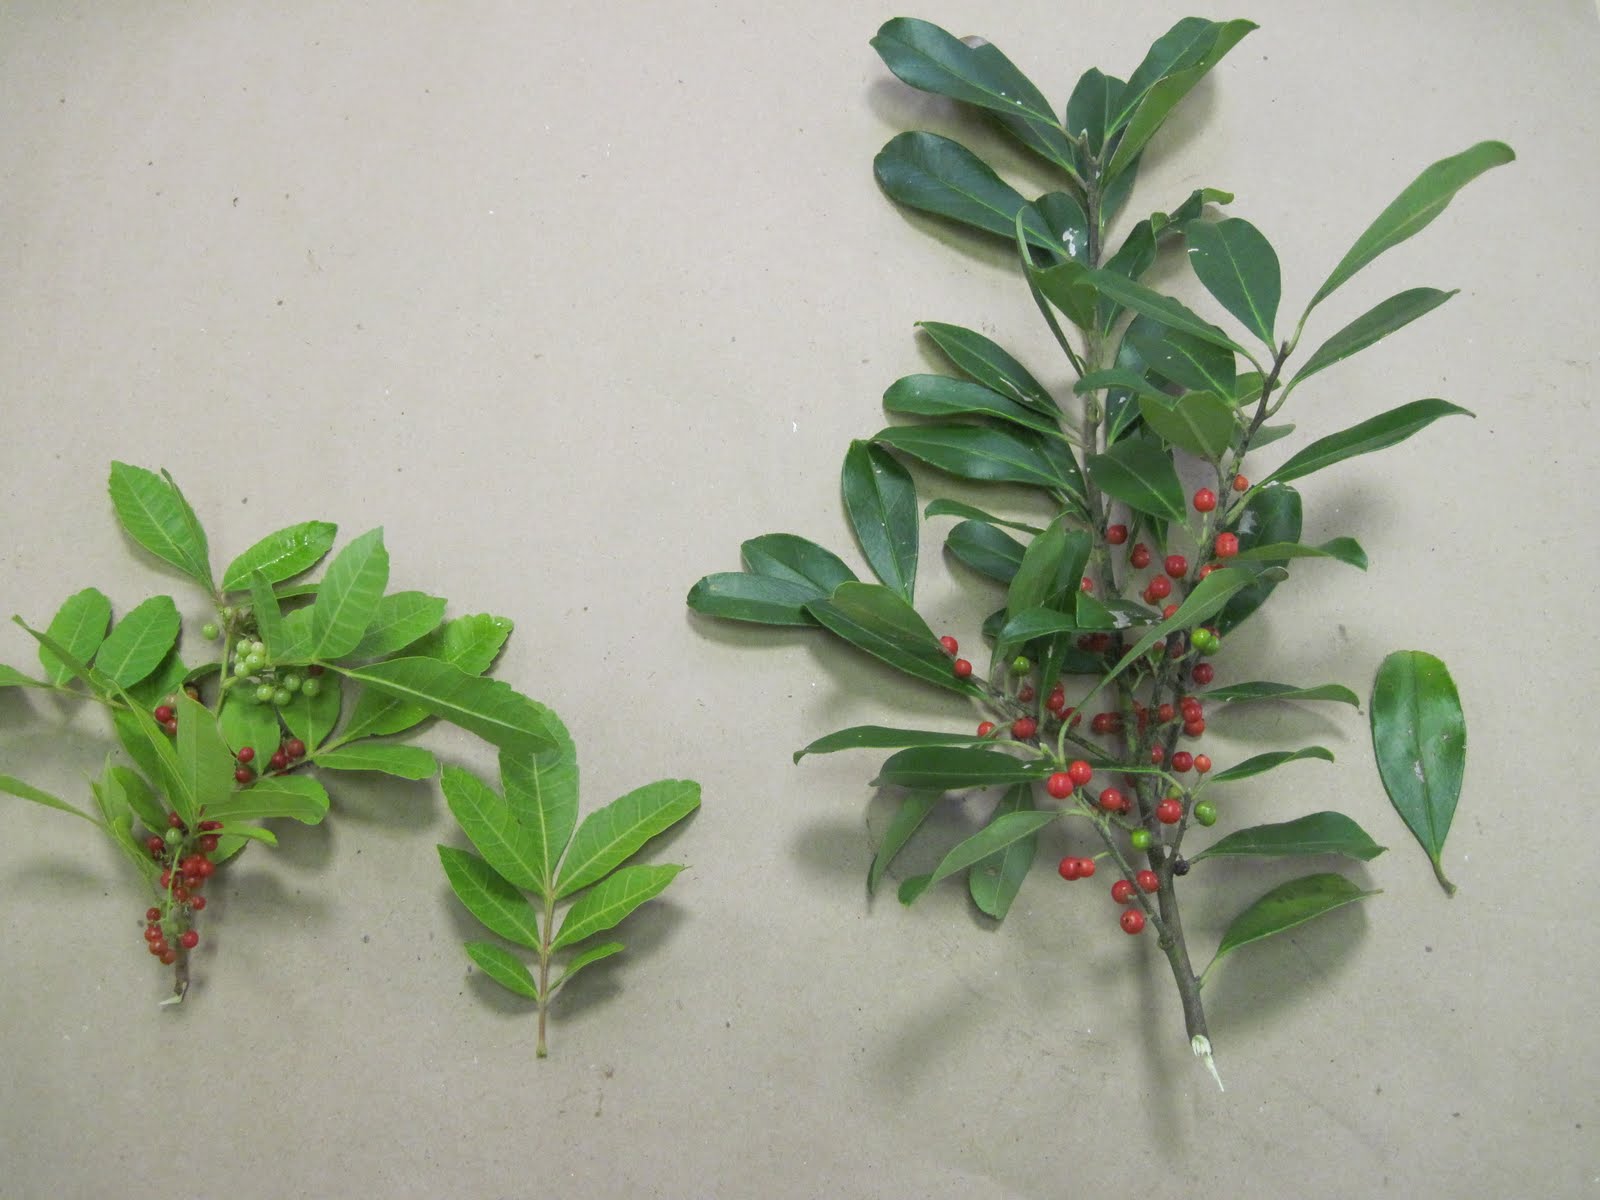
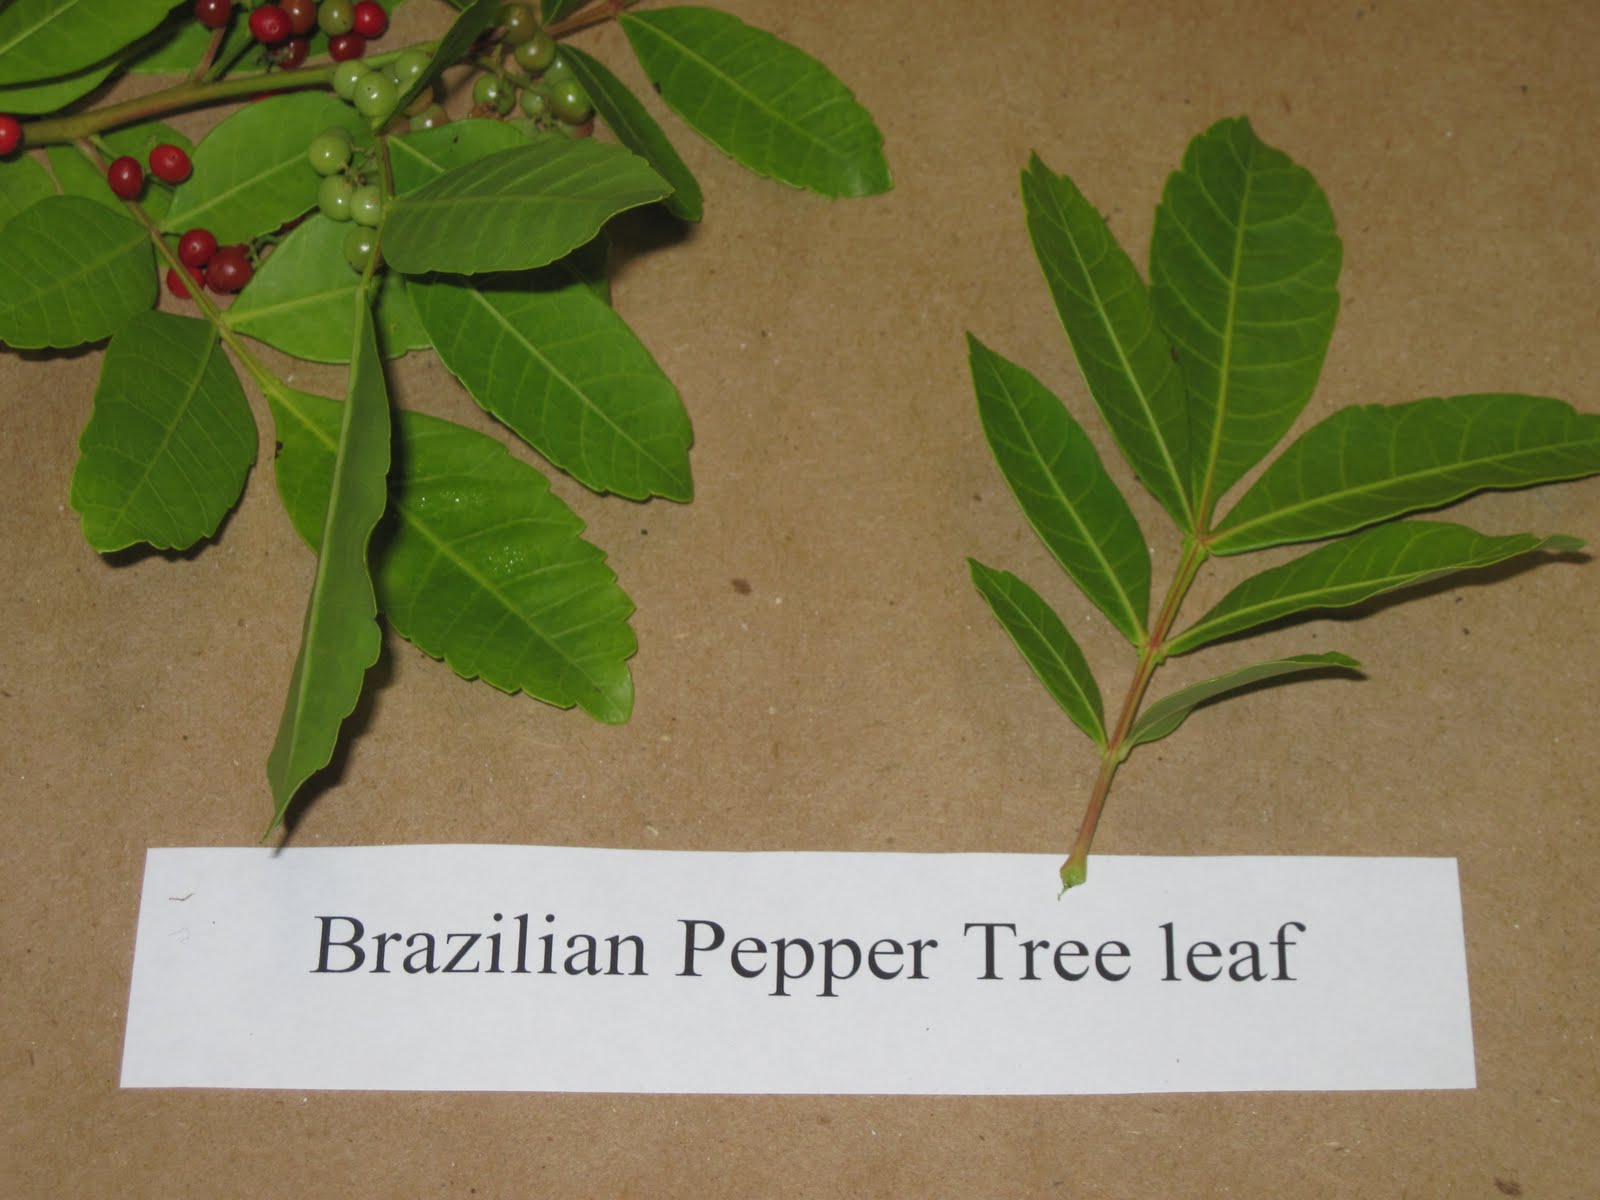
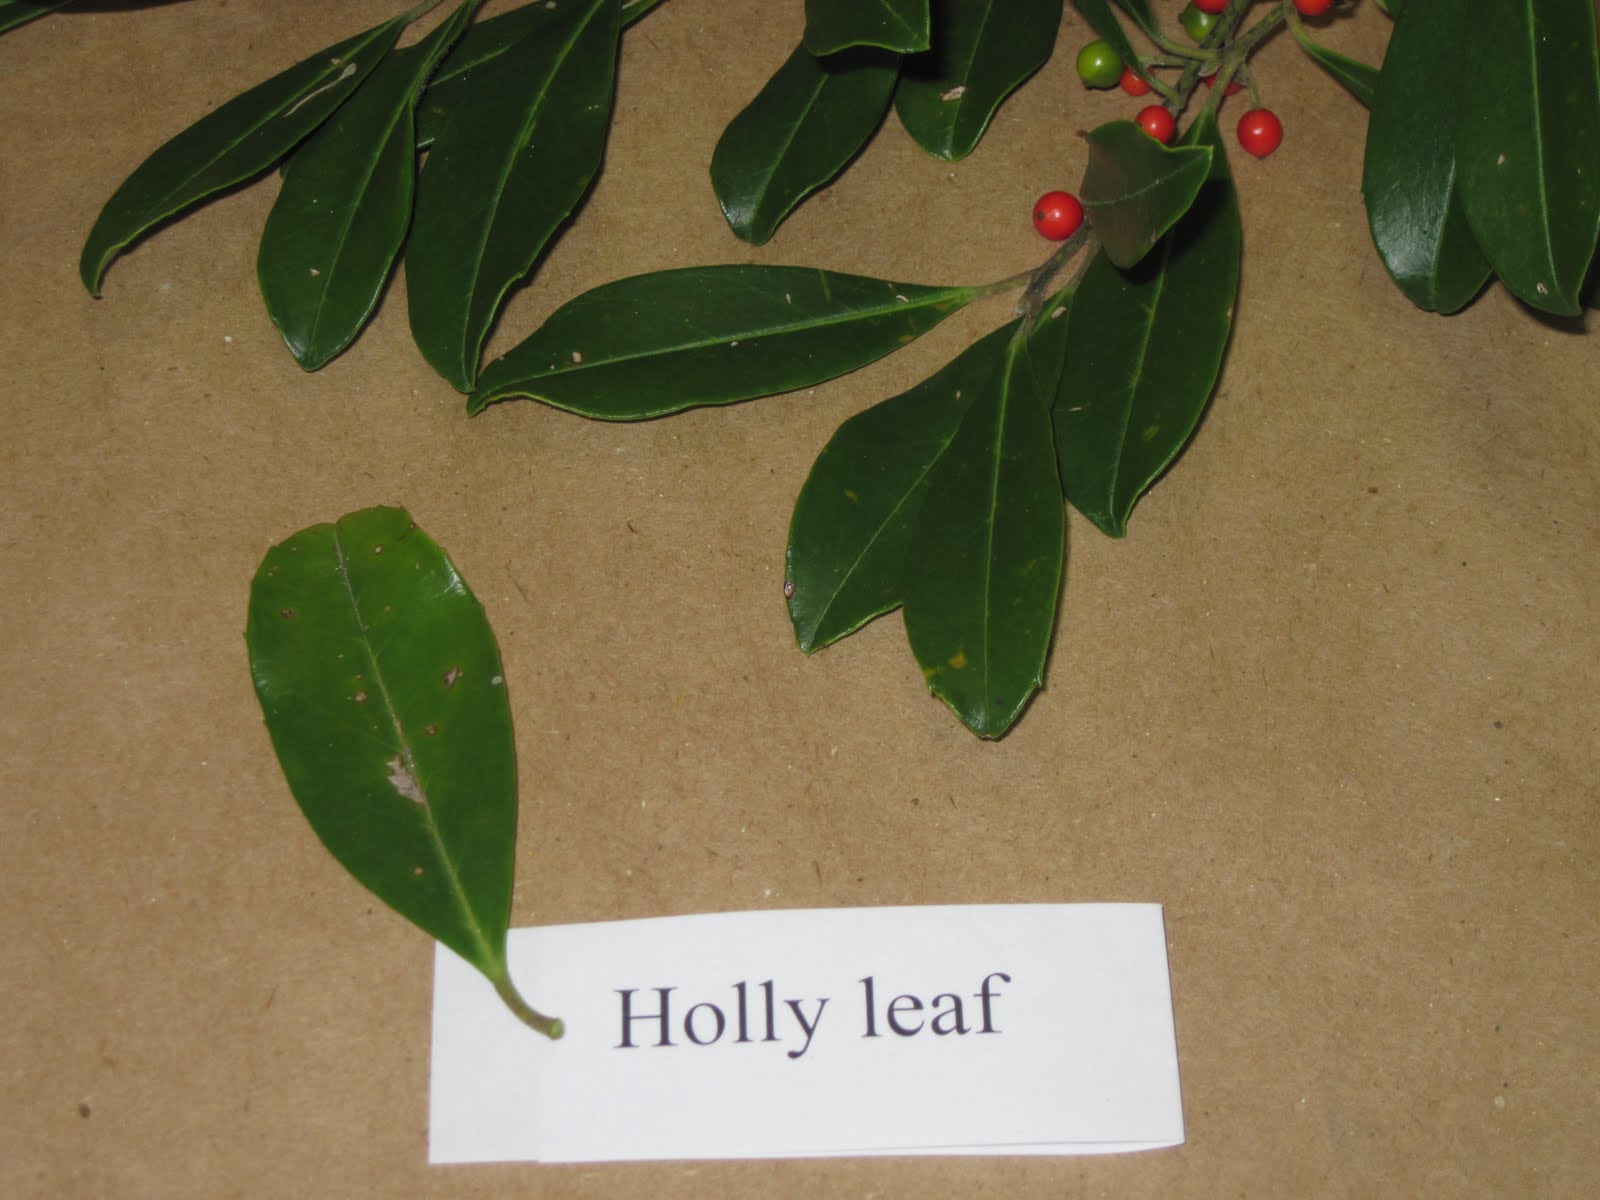
*Both pictures in this blog are by Dan Culbert, Horticulture Extension Agent in Okeechobee County, Florida


Monday, March 9, 2009

Treating Cold-Damaged Palms

By Andy Wilson, Horticulturist

Some areas of Pinellas County, particularly the northeastern section of the county, experienced a night or two of below freezing temperatures this winter. If you have palms showing cold damage, follow these suggestions from the University of Florida to increase the chances that they will recover.

First, remove the cold-damaged portions of the leaves. Leaves that are green but simply spotted from cold damage should not be removed. These leaves are needed to manufacture food for the palm through photosynthesis. Immediately after pruning, spray the palm with a fungicide containing copper at the rate recommended on the label. Add a spreader sticker to the spray solution. After 10 days, repeat the copper fungicide spray or apply another broad spectrum fungicide that is labeled for palms, such as some of the products containing mancozeb or chlorothalonil. After the 2 applications of fungicide have been made, apply a soluble micronutrient spray once a month, continuing into summer. A granular 8-2-12-4 palm fertilizer can applied in the spring and repeated about ever 3 months.

With palms with such severe damage that the spear leaf (the new unopened leaf) pulls out when gently tugged there is still a chance of recovery. Remove as much of the dead and decaying material and possible and then apply the copper fungicide, spraying down into the cavity where the spear leaf was previously attached. Reapply the copper fungicide in 10 days and continue with after care as above.

Remember that full recovery is a slow process. The palm will not look better until it has produced some healthy new fronds.

The information in this article is taken from the fact sheet Treating Cold-Damaged Palms by Dr. Timothy Broschat:
http://edis.ifas.ufl.edu/MG318

Tuesday, March 3, 2009

Black Gold


By Pam Brown, Urban Horticulture Extension Agent

Compost has been called black gold and it is lurking in the discarded yard and vegetable kitchen wastes. These wastes can be composted into a wonderful organic soil amendment.

Composting is the biological decomposition of organic wastes. In this case the organic wastes are ordinary vegetable and yard trimmings. This process happens naturally in the forests as leaves and other organic wastes decompose. And, you can do it in a controlled manner in your back yard.

Yard wastes make up about 20% or more of the collected municipal solid waste. Composting this material keeps it out of the waste stream and extends the life of landfills while at the same time produces a useful organic soil amendment. It is part of a commitment to recycling.

There are several ways to allow this organic decomposition to take place. One simple way is to let leaves from your oak or other trees fall to the ground around the tree and decompose there. This is a type of composting. Or, you can pile those leaves into a container at least 3x3x3 along with other yard trimmings that have been chopped (run over them with your lawn mower) and vegetable wastes, coffee grounds and egg shells from your kitchen. Turn it occasionally and keep it moist. In a few months you will have great compost to add to your garden beds. You do not want to put animal wastes, bones, oils, fat or dairy products into your compost. They will decompose, but they will probably attract unwanted critters to your pile.

Adding compost to your garden and landscape helps create good soil structure. It helps our sandy soils retain water and nutrients so that they are available to the plants for a longer period. And, compost feeds the diverse critters in the soil that are necessary for healthy soil. Soil enriched with compost contains lots of beneficial insects, worms and other critters that burrow through the soil and keep it aerated as well as beneficial microbes that can actually protect plant roots from soil borne diseases.

We periodically present “Compost Happens” classes where you can learn all about composting and possibly take home a compost bin as a door prize. Check out our web site at
http://pinellascounty.org then click on “calendar” to find the dates of the next classes. You can register on-line as well.

For more information, please access these University of Florida/IFAS Extension publications or watch our short video.

Compost Tips for the Home Gardener
http://edis.ifas.ufl.edu/document_ep323

Construction of Home Compost Units
http://edis.ifas.ufl.edu/document_he026

Tuesday, February 24, 2009

Fertilizing for Spring Green

By Pam Brown, Urban Horticulture Extension Agent

When you start seeing new green leaves on landscape plants or your grass is beginning to grow, it is time for spring fertilizing. At the most basic level, fertilizers provide nutrients that help plants grow better. You can fertilize by applying compost, a packaged commercial fertilizer or a specific mineral, such as iron. Lawns, woody landscape plants and palms benefit from different fertilizer blends, so I encourage you to review the linked University of Florida/IFAS publications listed below for specifics.

When selecting fertilizer, you will see three numbers listed on the bag like 15-0-15 or 16-2-8. The first number is the percent of Nitrogen contained in the bag, the second number is the percent Phosphorus and the third is Potassium. You will want to look for slow-release fertilizers or at least fertilizers with a high percentage of slow-release nitrogen in them. Nitrogen promotes shoot growth, so if you use slow-release nitrogen, you will have less of a succulent new growth surge. Using slow-release fertilizers can lead to less insect problems for both lawns and landscape plants since insects are attracted to the tender new growth. Slow-release products are also less likely than 100% water soluble fertilizers to leach through the soil to ground water in heavy rain events. When looking for slow-release, other words can mean this same thing, like poly coated, sulfur coated, or water-insoluble.

Be careful when applying fertilizers, they can be a real source of pollution in our waterways, bay and gulf. It is best not to apply fertilizer if heavy rain is forecast. Using a drop spreader will help keep fertilizer away from water bodies, driveways and sidewalks. If you spill fertilizer granules, sweep them up or back up onto the lawn. Rinsing them off hard surfaces with a hose could send fertilizer down the storm drain. In the summer you can apply chelated iron or iron sulfate instead of nitrogen to green up the lawn without increasing growth. Also use caution applying “weed and feed” products. The herbicides in these products can injure some trees and shrubs.

Fertilization of Turfgrasses on Florida Soils
http://edis.ifas.ufl.edu/document_lh014
Fertilizer Recommendations for Landscape Plants
http://edis.ifas.ufl.edu/EP114
Fertilizing Landscape Palms in Florida Landscapes
http://edis.ifas.ufl.edu/EP261
How to Calibrate Your Fertilizer Spreader
http://edis.ifas.ufl.edu/document_lh024


Friday, February 13, 2009

Try Growing Herbs

By Pam Brown, Urban Horticulture Extension Agent, Pinellas County Extension

There are many different herbs that can be grown in our gardens. Herbs for cooking come to mind and are probably the most useful to the home gardener.

Most culinary herbs can be grown in Florida. Herbs with gray-green leaves like lavender, wormwood, and lambs ears do best in our cooler months as they tend to get moldy during our humid summer. Rosemary, parsley, dill and chives are very popular and are easy to grow. Rosemary will grow into quite a large bush. Basil is an annual, so to keep a good supply, plant seeds every few weeks to keep vigorous plants all summer and through fall. Parsley and dill will attract swallow-tail butterfly caterpillars, so plant enough to share.

To successfully grow herbs, choose an area with 4 – 6 hours of sun and well-drained soil. Herbs do not like wet feet so in our rainy summers it is a challenge to keep them happy. Adding compost can help with drainage, will add slow release nutrients, and help keep down fungal diseases. Herbs do not like much fertilizer ‑ that is why compost is a good source of nutrients. Too much fertilizer will cause fast growth at the expense of developing the oils that are the source of the flavors or scents. If you plant mint, be aware that it can grow rampantly so you might want to keep it in a pot where no roots can get into the garden soil. It can become very aggressive to the point of crowding out other desirable plants.

Speaking of pots, use pots with good drainage. The soil you use should be loose and well drained. You can make a good mix for container grown herbs by mixing equal parts of potting soil, peat moss, and perlite (or vermiculite). Watering is the most difficult part of container gardening. Plants growing in containers dry out faster than those in the ground, so you will need to check the pots every day when the weather is warm and dry.

For additional information, check out our short video below and for further reading access the UF/IFAS Extension publication Herbs in the Florida Garden at; http://edis.ifas.ufl.edu/document_vh020

Tuesday, February 3, 2009

Early Spring Rose Care

By Pam Brown, Horticulture Extension Agent

If you have roses in your landscape, the spring chores of pruning, fertilizing and mulching need to be started now.

What do we do first?
Pruning is first ‑ choose three to four healthy large canes, then completely prune out all of the small canes. Also remove those that grow in toward the center of the plant or are rubbing other canes. Choose an outward facing bud and prune at a 45 degree angle about 1/4 inch above the bud. Prune to healthy wood ‑ green bark on the cane and white pith core revealed with the pruning cut. If the pith is brownish ‑ prune further down or remove the cane all together. The American Rose Society recommends covering the cut surfaces where you prune with white glue to discourage boring insects. Clean up all leaves, canes and other debris around the roses. This helps remove the fungal spores that have over wintered and cause the dreaded black spot disease on the leaves.

What types of fertilizers are best for our roses?
A commercial fertilizer with a ratio of 3 N ‑ 1 P ‑ 2 K that also includes Magnesium and has at least 50% of the Nitrogen as a slow release form is a good choice. Some rose references recommend adding bone meal or superphosphate to the soil at planting and then in the spring, but we already have sufficient phosphorus in the soil and adding this might lead to toxicity for the plant. You can find special rose fertilizer, but be cautious if the second number is very high. We do need to fertilize about 6 times in our area during the growing season. ½ cup of Epsom salts per plant will add needed Magnesium if the fertilizer does not contain it.

Is mulching a good idea around roses?
Yes ‑ organic mulch always helps to reduce the loss of soil moisture, keeps down weeds that compete for nutrients and helps keep the temperature of the soil constant. Remember to keep the mulch a few inches away from the base of the rose plant. Piling mulch up against the base can encourage fungal diseases.

And that awful disease black spot ‑ what should we do for this?
Many of the hybrid roses are very susceptible to the fungal disease black spot. First a yellow spot forms then the center turns black and eventually the whole leaf dies and falls to the ground. Keep the area around the roses clean and start a spraying schedule early. There are fungicides for this problem and a home remedy called the Cornell Fungicide formula that works fairly well if started early. The best thing to do is to plant roses that are disease resistant such as “old garden roses” and shrub roses such as the “Knock-out” series. Then you can just stand back and admire them.


Please also view our short video on growing roses.


Additional information is avialable on the Internet from the University of Florida/IFAS Extension:

Growing Roses in Florida
http://edis.ifas.ufl.edu/EP339

Pests of Roses in Florida
http://edis.ifas.ufl.edu/EP371

Thursday, January 22, 2009

What to do After a Freeze


By Pam Brown, Urban Horticulture Extension Agent

The last two nights have brought freezing or near freezing temperatures to our area. Many of the plants that are used in landscapes in the Tampa Bay area can be vulnerable to these temperatures.

The first thing to do for landscape plants after a freeze is check that the soil has adequate moisture – not soggy, but moist. Some plants in pots may have frozen soil. Adding water to the pots to defrost the soil will make water available for the plants.

Plants that have been damaged by the cold will start to look wilted, then leaves may turn brown and die. You may be tempted to start pruning these plants back, but it is best to wait until the new growth starts in the spring. When the new leaves begin to sprout, you will know how far to prune back on each branch. You can remove the dead leaves if they are in an area where they are unsightly, but leaving them on might provide some cold protection for the rest of the plant if we get more freezing weather. It is often difficult to determine how far freeze damage extends. If you are worried that the plant is dead, gently scrape the bark on a stem, if the cambium layer just under the bark is still green then the plant is alive.

Some herbaceous plants - not woody like shrubs and trees – such as bananas, impatiens, and begonias will most likely collapse and need to just be cut down and removed. This will reduce fungal or bacterial problems as these dead plants decay. Banana trees will usually send up new pups from the root system in the spring.

You may also find that your lawn has been damaged by freezing temperatures. Our most common lawn grass, Floratam St. Augustine, is the most sensitive to cold temperatures. Zoysia, Bermuda and Bahia grass are more cold tolerant. When freezing temperatures have been preceded by warm temperatures, damage is more likely. Grass can look wilted, then turn whitish and then black. All may not be lost – but you will have to wait until spring to really know for sure. Cold damage initially may look like drought stress, but adding to much water while the grass is nearly dormant is not necessary and will waste water resources. More information can be found in the University of Florida (UF)/IFAS Extension publication Low Temperature Damage to Turf at: http://edis.ifas.ufl.edu/LH067

I have also seen many cold sensitive palms planted in our area and these palms are likely to be damaged by freezing temperatures. There are ways to possibly save them by treating the bud with Copper fungicide. The UF/IFAS Extension publication Treating Cold Damaged Palms is available at:
http://edis.ifas.ufl.edu/MG318

Also see the December 10, 2008 post to this blog: Cold Protection for Landscape Plants


Friday, January 16, 2009

Flowers in Winter


By Pam Brown, Urban Horticulture Extension Agent

Flowers in winter are one of the joys of living in Florida. They can provide a needed splash of color to areas where there is only green. During our winter, nights are cool with an occasional frost and maybe a rare freeze accompanied by warm days and fairly low humidity. If you are accustomed to growing things like petunias, snapdragons, and foxglove in early spring to north of Florida, then you will be surprised to know that you can plant them during winter here in Pinellas County.

When planting your flowers, spade up the area and mix some organic material like compost along with a balanced slow release fertilizer in the amount specified on the label. You are now ready to plant. Always dig a hole a little wider than and just as deep as the root ball. Add water to the planting hole then put the plant in at the same depth it was growing in the container. Firm the soil around the plant’s roots and water lightly again. Once the whole area is planted, add a thin layer of mulch, keeping the mulch away from the base of each plant. Water the whole planting once again and keep the soil moist for about two weeks until the plants are established. We have less rain during winter, but plants need less water due to the cooler temperatures, so water only when the soil feels dry.

Some popular annuals that can be planted now that will give you color through the winter months include: Ageratum, Alyssum, Calendula, Geranium, Marigold, Nasturtium (you might want to try planting seeds of this annual), Nicotiana, Ornamental Pepper, Petunia, Pansy, Snapdragon, Sweet Peas (another to try with seeds), Viola, and Wax Begonia.

Check out our short video for more tips on planting flowers for winter color.

For additional information, access the University of Florida/IFAS publication Annual Flowers for Florida at:
http://edis.ifas.ufl.edu/MG018.